
Dieser Artikel zeigt wie man auf Basis von einem Debian Linux einen Shared-Webhosting Server aufsetzt und konfiguriert. Der Fokus wird hierbei auf der Sicherheit liegen. So sollen nur moderne Verschlüsselungstechnologien (wie TLS1.3 / TLS 1.2 mit PFS und modernen Crypto-ciphern) zum Einsatz kommen. Die einzelnen Webpräsenzen werden voneinander isoliert laufen. Die Zertifikate werden kostenlos und automatisch von Let’s Encrypt ausgestellt.
Installation des Grundsystems
Vermutlich wird der Server / die VM / der Raspberry Pi bereits existieren, wenn Du Dir Gedanken zu Webhosting machst. Daher werde ich auch keine Step-by-Step Anleitung für eine Debian (10/Buster) Installation geben. Dieser Guide funktioniert natürlich auch mit jedem anderen Linux / BSD Derivat. Unterschiede gibt es möglicherweise bei der Ordnerstruktur der von der Paketverwaltung installierten Konfigurationsdateien und den genauen Versionen der Pakete.
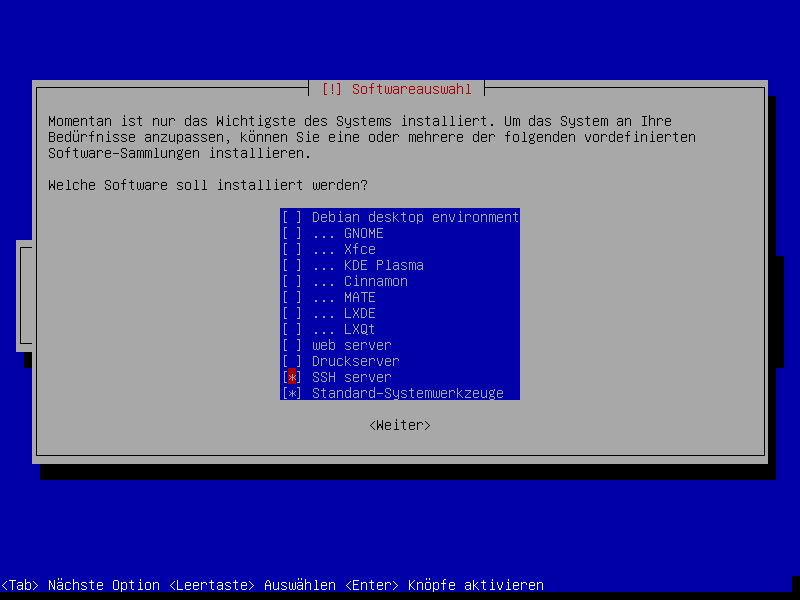
Bei der Installation von Debian Buster brauchen wir uns noch nicht darum zu kümmern, welche Softwarepakete wir später benötigen. Eine Grundinstallation mit den Software-Sammlungen „SSH Server“ und „Standard-Systemwerkzeuge“ reicht vollkommen als Grundlage.
Benötigte Komponenten
Ich muss zugeben, ich werde nicht nur langsam alt, sondern bin auch etwas oldschool in meiner Softwarepräferenz. So verwende ich tatsächlich bis zum heutigen Tage gerne den Apache Webserver. Und wegen seiner Ähnlichkeit in der Konfiguration auch den ProFTPd für den Dateizugriff via FTPS. Beides sind vergleichsweise fette und langsame Softwareprodukte, dafür aber sehr mächtig zu konfigurieren. Da die Hauptworkload allerdings auf den Code-Interpreter und die Datenbank entfallen werden, kann man die Webservergeschwindigkeit schon fast vernachlässigen.
Natürlich kann man auch einen nginx oder lighttpd oder auch ganz was Anderes verwenden, dann wird sich die Konfiguration in Nuancen unterscheiden.
PHP, wie viele es sicherlich benutzen wollen, hole ich von sury.org, da diese Pakete deutlich aktueller sind als im Debian Repository. Als process manager verwende ich php-fpm.
Als Datenbank verwende ich MariaDB. Postgres geht natürlich auch. Man könnte sie sogar parallel betreiben, allerdings dürfte dies bei großen Datenbanken etwas speicherhungrig werden, wenn die Ressourcen knapp sind.
Webhosting-Software installieren
Zuerst einmal werden alle später benötigten Paketquellen und Pakete installiert:
root@debian:~# apt -y install apt-transport-https lsb-release ca-certificates
root@debian:~# wget -O /etc/apt/trusted.gpg.d/php.gpg https://packages.sury.org/php/apt.gpg
root@debian:~# sh -c 'echo "deb https://packages.sury.org/php/ $(lsb_release -sc) main" > /etc/apt/sources.list.d/php.list'
root@debian:~# apt update
root@debian:~# apt upgrade
root@debian:~# apt install apache2 apache2-utils acmetool mariadb-server mariadb-client php7.3-bcmath php7.3-cgi php7.3-cli php7.3-common php7.3-curl php7.3-fpm php7.3-gd php7.3-imap php7.3-intl php7.3-json php7.3-mbstring php7.3-mysql php7.3-opcache php7.3-pspell php7.3-readline php7.3-xml php7.3-zip ccze proftpdCode-Sprache: PHP (php)
Software konfigurieren
Apache2 konfigurieren
Früher musste man für das (nach wie vor nicht threadsichere) PHP den mpm-prefork verwenden. Dieses Vorgehen ist leider sehr ressourcenhungrig. Insbesondere der RAM wird hierbei exzessiv genutzt.
Verwendete man dann jedoch PHP im fastcgi / FPM Modus, lautete die Empfehlung lange Zeit den mpm-worker zu verwenden. Neu seit Apache 2.4 ist der mpm-event handler. Dieser macht im Prinzip das gleiche wie der worker, soll aber noch höhere Arbeitslasten bewältigen können und wird somit auch empfohlen.
Apache Webserver Module aktivieren
Ferner aktivieren wir noch einige zusätzliche Module, die wir später noch benötigen.
root@debian:~# a2enmod rewrite mpm_event http2 proxy_fcgi proxy ssl headers
Enabling module rewrite.
Considering conflict mpm_worker for mpm_event:
Considering conflict mpm_prefork for mpm_event:
Module mpm_event already enabled
Enabling module http2.
Considering dependency proxy for proxy_fcgi:
Enabling module proxy.
Enabling module proxy_fcgi.
Module proxy already enabled
Considering dependency setenvif for ssl:
Module setenvif already enabled
Considering dependency mime for ssl:
Module mime already enabled
Considering dependency socache_shmcb for ssl:
Enabling module socache_shmcb.
Enabling module ssl.
See /usr/share/doc/apache2/README.Debian.gz on how to configure SSL and create self-signed certificates.
Enabling module headers.
To activate the new configuration, you need to run:
  systemctl restart apache2
root@debian:~# systemctl restart apache2Code-Sprache: PHP (php)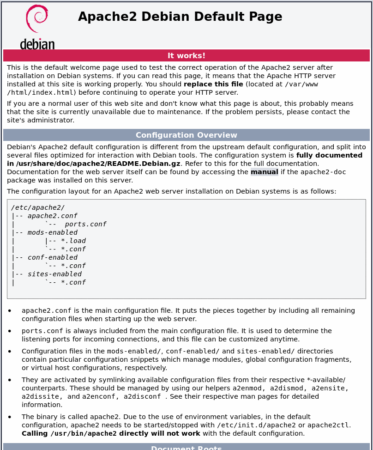
Jetzt lauscht der Webserver bereits auf allen (IPv4/IPv6) IPs und liefert die Debian/Apache2 landing page aus. Allerdings brauchen wir diese nicht, und deaktivieren sie daher.
root@debian:~# a2dissite 000-default
root@debian:~# a2dissite default-sslCode-Sprache: PHP (php)
NameVirtualHost konfigurieren
Außerdem soll er nur auf den vorgesehenen IPs Webseiten ausliefern. Daher erstellen wir die Datei /etc/apache2/conf.d/namevirtualhost.conf mit folgendem Inhalt:
NameVirtualHost 10.222.3.52:80
NameVirtualHost 10.222.3.52:443
NameVirtualHost 2a02:f08:e:1344:a00:27ff:fe05:6023:80
NameVirtualHost 2a02:f08:e:1344:a00:27ff:fe05:6023:443Code-Sprache: CSS (css)
TLS härten
Hierzu die Datei /etc/apache2/mods-available/ssl.conf bearbeiten:
<IfModule mod_ssl.c>
	# Pseudo Random Number Generator (PRNG):
	# Configure one or more sources to seed the PRNG of the SSL library.
	# The seed data should be of good random quality.
	# WARNING! On some platforms /dev/random blocks if not enough entropy
	# is available. This means you then cannot use the /dev/random device
	# because it would lead to very long connection times (as long as
	# it requires to make more entropy available). But usually those
	# platforms additionally provide a /dev/urandom device which doesn't
	# block. So, if available, use this one instead. Read the mod_ssl User
	# Manual for more details.
	#
	SSLRandomSeed startup builtin
	SSLRandomSeed startup file:/dev/urandom 512
	SSLRandomSeed connect builtin
	SSLRandomSeed connect file:/dev/urandom 512
	##
	##  SSL Global Context
	##
	##  All SSL configuration in this context applies both to
	##  the main server and all SSL-enabled virtual hosts.
	##
	#
	#   Some MIME-types for downloading Certificates and CRLs
	#
	AddType application/x-x509-ca-cert .crt
	AddType application/x-pkcs7-crl	.crl
	#   Pass Phrase Dialog:
	#   Configure the pass phrase gathering process.
	#   The filtering dialog program (`builtin' is a internal
	#   terminal dialog) has to provide the pass phrase on stdout.
	SSLPassPhraseDialog  exec:/usr/share/apache2/ask-for-passphrase
	#   Inter-Process Session Cache:
	#   Configure the SSL Session Cache: First the mechanism
	#   to use and second the expiring timeout (in seconds).
	#   (The mechanism dbm has known memory leaks and should not be used).
	SSLSessionCache		shmcb:${APACHE_RUN_DIR}/ssl_scache(512000)
	SSLSessionCacheTimeout  300
	#   Semaphore:
	#   Configure the path to the mutual exclusion semaphore the
	#   SSL engine uses internally for inter-process synchronization.
	#   (Disabled by default, the global Mutex directive consolidates by default
	#   this)
	#Mutex file:${APACHE_LOCK_DIR}/ssl_mutex ssl-cache
	#   SSL Cipher Suite:
	#   List the ciphers that the client is permitted to negotiate. See the
	#   ciphers(1) man page from the openssl package for list of all available
	#   options.
	#   Enable only secure ciphers:
	SSLCipherSuite EECDH+AESGCM:EDH+AESGCM

	SSLOpenSSLConfCmd Curves X25519:secp521r1:secp384r1:prime256v1
	# SSL server cipher order preference:
	# Use server priorities for cipher algorithm choice.
	# Clients may prefer lower grade encryption.  You should enable this
	# option if you want to enforce stronger encryption, and can afford
	# the CPU cost, and did not override SSLCipherSuite in a way that puts
	# insecure ciphers first.
	# Default: Off
	SSLHonorCipherOrder on
	#   The protocols to enable.
	#   Available values: all, SSLv3, TLSv1, TLSv1.1, TLSv1.2
	#   SSL v2  is no longer supported
	SSLProtocol All -SSLv2 -SSLv3 -TLSv1 -TLSv1.1
	#   Allow insecure renegotiation with clients which do not yet support the
	#   secure renegotiation protocol. Default: Off
	#SSLInsecureRenegotiation on
	#   Whether to forbid non-SNI clients to access name based virtual hosts.
	#   Default: Off
	SSLStrictSNIVHostCheck On

	Header always set Strict-Transport-Security "max-age=63072000; includeSubDomains; preload"
#	Problems with (i)frames
#	Header always set X-Frame-Options DENY
#	Header always set X-Content-Type-Options nosniff
	# Requires Apache >= 2.4
	SSLCompression off
	SSLUseStapling on
	SSLStaplingCache "shmcb:logs/stapling-cache(150000)"
	# Requires Apache >= 2.4.11
	SSLSessionTickets Off
</IfModule>Code-Sprache: PHP (php)
http2 konfigurieren
Um http2 sinnvoll einzurichten, bearbeite ich die Datei /etc/apache2/mods-available/http2.conf und ändere ihren Inhalt zu:
# enable http2 for http and https
Protocols h2 h2c http/1.1
# configure push
H2Push          on
H2PushPriority  *                       after
H2PushPriority  text/css                before
H2PushPriority  image/jpeg              after   32
H2PushPriority  image/png               after   32
H2PushPriority  application/javascript  interleavedCode-Sprache: PHP (php)
Benutzer anlegen
Soll der Server das Webhosting für mehrere Webpräsenzen übernehmen, empfiehlt es sich, diese unter eigenen Benutzern laufen zu lassen.
root@debian:~# adduser --home /var/www/www.theinterwebz.de/docs --group --system web1
root@debian:~# adduser web1 www-data
root@debian:~# chown -R web1:web1 /var/www/www.theinterwebz.de/docs/Code-Sprache: PHP (php)
https-redirect konfigurieren
Für die Weiterleitung von http://… auf https://… lege ich eine allgemeine Config-Datei an, die ich je nach Bedarf in VHosts inkludieren kann.
/etc/apache2/conf-available/https-redirect.conf
<IfModule mod_rewrite.c>
	RewriteEngine On
	RewriteCond %{REQUEST_URI} !^/\.well\-known/acme\-challenge/
	RewriteCond %{HTTPS} off [OR]
	RewriteCond %{HTTP_HOST} !^www\. [NC]
	RewriteCond %{HTTP_HOST} ^(?:www\.)?(.+)$ [NC]
	RewriteRule ^ https://www.%1%{REQUEST_URI} [R=301,L]
</IfModule>Code-Sprache: HTML, XML (xml)
VirtualHost anlegen
Der Webserver ist nun weitgehend fertig konfiguriert, lediglich die VirtualHosts fehlen noch. Ich erstelle hier gerne jeweils einen für http:// und einen für https:// und inkludiere die eigentliche, innere Konfiguration ausschließlich im SSL-VHost.
/etc/apache2/sites-available/www.theinterwebz.de.conf
<VirtualHost 10.222.3.52:80 2a02:f08:e:1344:a00:27ff:fe05:6023:80>
   ServerName www.theinterwebz.de
   ServerAlias theinterwebz.de

  IncludeOptional conf-available/https-redirect.conf

	ErrorLog /var/log/apache2/www.theinterwebz.de.error.log
	CustomLog /var/log/apache2/www.theinterwebz.de.access.log combined
</VirtualHost>Code-Sprache: HTML, XML (xml)
Wie man sieht, macht dieser VHost nichts anderes, als von der aufgerufenen URL zu https:// samt aller Parameter umzuleiten – es sei denn, es wird eine Datei aus „/.well-known/acme-challenge/“ angefragt. Dann wird die Datei ausgeliefert. Ein Code Interpreter kann im http:// VHost nicht aufgerufen werden.
Beim SSL-VHost müssen wir die Pfade für die Let’s Encrypt Zertifikate noch antizipieren, diese erstellen wir gleich erst. Daher aktivieren wir bis dahin auch nur den unverschlüsselten.
/etc/apache2/sites-available/www.theinterwebz.de-ssl.conf
<VirtualHost 10.222.3.52:443 2a02:f08:e:1344:a00:27ff:fe05:6023:443>
	SSLCertificateFile      /var/lib/acme/live/www.theinterwebz.de/cert
	SSLCertificateKeyFile   /var/lib/acme/live/www.theinterwebz.de/privkey
	SSLCertificateChainFile /var/lib/acme/live/www.theinterwebz.de/chain
	SSLOptions StrictRequire
	SSLEngine On
	<IfModule mod_headers.c>
		Header always set Strict-Transport-Security "max-age=15768000; includeSubDomains; preload"
	</IfModule>

	Include /etc/apache2/sites-available/www.theinterwebz.de-base.conf
	ErrorLog /var/log/apache2/www.theinterwebz.de.error.log
	CustomLog /var/log/apache2/www.theinterwebz.de.access.log combined
</VirtualHost>Code-Sprache: PHP (php)
Im https:// VHost definiere ich einen ProxyHandler, der auf den UNIX-Socket (oder wahlweise TCP-Socket an localhost) des PHP-FPM weist. Dateien deren Endung mit „php“ beginnt, werden an diesen weitergeleitet. Sollen statt PHP, Python oder cgi-Skripte ausgeführt werden, muss der Passus entsprechend angepasst werden. Außerdem setze ich noch einen „lustigen“ HTTP-X-Header, den niemand sehen wird – es sei denn er inspiziert die HTTP-Header
/etc/apache2/sites-available/www.theinterwebz.de-base.conf
	ServerAdmin admin@theinterwebz.de

	ServerName www.theinterwebz.de
	ServerAlias theinterwebz.de

	DirectoryIndex index.htm index.html index.php
	DocumentRoot /var/www/www.theinterwebz.de/docs/
	<Directory />
		Options FollowSymLinks
		AllowOverride None
	</Directory>

	<Directory /var/www/www.theinterwebz.de/docs/>
		Options -Indexes +FollowSymLinks +MultiViews +Includes
		AllowOverride All
		Order allow,deny
		allow from all
	</Directory>
	<IfModule mod_proxy_fcgi.c>
		<Proxy "unix:/var/run/php/php7.3-fpm-theinterwebz.sock|fcgi://php7.3-fpm-theinterwebz">
			# we must declare a (any) parameter in here
			# or it won't register the proxy ahead of time
			ProxySet connectiontimeout=5 timeout=180
		</Proxy>
		<FilesMatch ".+\.php$">
			SetHandler proxy:fcgi://php7.3-fpm-theinterwebz
		</FilesMatch>
	</IfModule>
	<IfModule mod_headers.c>
		Header always set X-CATS "All your base are belong to us"
	</IfModule>
	# Possible values include: debug, info, notice, warn, error, crit,
	# alert, emerg.
	LogLevel warn
	ServerSignature OnCode-Sprache: PHP (php)
PHP konfigurieren
Das php7.3-fpm von sury kommt (wie auch die älteren Debian Pakete) schon ganz brauchbar vorkonfiguriert, so müssen wir eigentlich nur einen PHP-Pool definieren und ihm den bereits im VHost verwendeten Namen geben. Eine gut kommentierte Vorlage findet sich bereits in www.conf. Auch wenn wir diese löschen werden, können wir sie als Kopiervorlage verwenden. Aufgrund der Länge zeige ich die angepasste /etc/php/7.3/fpm/pool.d/www.theinterwebz.de.conf ohne Kommentarzeilen.
root@debian:/etc/php/7.3/fpm/pool.d# cp www.conf www.theinterwebz.conf
root@debian:/etc/php/7.3/fpm/pool.d# rm www.conf
root@debian:/etc/php/7.3/fpm/pool.d# service php7.3-fpm restartCode-Sprache: PHP (php)
grep -Ev '^#|^;' /etc/php/7.3/fpm/pool.d/www.theinterwebz.de.conf
[theinterwebz]
user = web1
group = web1
listen = /var/run/php/php7.3-fpm-theinterwebz.sock
listen.owner = www-data
listen.group = www-data
pm = dynamic
pm.max_children = 20
pm.start_servers = 2
pm.min_spare_servers = 1
pm.max_spare_servers = 3
chdir = /
php_admin_value[error_log] = /var/log/fpm-php.theinterwebz.log
php_admin_flag[log_errors] = on
php_admin_value[memory_limit] = 128M
php_admin_value[post_max_size] = 200M
php_admin_value[upload_max_filesize] = 200MCode-Sprache: PHP (php)
Let’s Encrypt einrichten
Zuerst muss die Grundkonfiguration erstellt werden. Dies geht am Einfachsten mit acmetool quickstart --expert. Es öffnet sich ein ncurses-dialog, der nacheinander ein paar Angaben abfragt:
- ACME Server: ‚Let’s Encrypt (Live)‘
- Key Type Selection: ‚ECDSA‘
- ECDSA Curve Selection: ‚NIST P-384‘
- Select Challenge Conveyance Method: Press ‚1‘ for WEBROOT
- Enter Webroot Path: ‚/var/run/acme/acme-challenge‘
- Are you sure?: ‚Yes‘
Der Pfad /var/run/acme/acme-challenge ist derselbe, der auch schon vom acmetool Paket für den Indianer in /etc/apache2/conf-available/acmetool.conf als globaler Alias definiert wurde.
------------------------- Quickstart Complete ----------------------
The quickstart process is complete.
Ensure your chosen challenge conveyance method is configured properly
before attempting to request certificates. You can find more
information about how to configure your system for each method in the
acmetool documentation:
https://github.com/hlandau/acme/blob/master/_doc/WSCONFIG.md
To request a certificate, run:

$ sudo acmetool want example.com www.example.com
If the certificate is successfully obtained, it will be placed in
/var/lib/acme/live/example.com/{cert,chain,fullchain,privkey}.
Zertifikat beantragen
Damit ein Zertifikat ausgeliefert werden kann, muss:
- Der hostname ‚www.theinterwebz.de‘ korrekt im DNS aufgelöst werden können
- Der Webserver auf Port 80 und/oder 443 lauschen
- Eine etwaige vorgeschaltete Firewall Traffic von Let’s Encrypt zum Webserver durchlassen
- Das ‚acme-challenge“ unter ‚http://www.theinterwebz.de/.well-known/acme-challenge‘ vom Webserver ausgeliefert werden (dies sollte durch die soeben getätigte Config gegeben sein)
Jetzt sollte man erfolgreich mit acmetool want www.theinterwebz.de ein Zertifikat besorgen können.
root@debian:~# acmetool status
Settings:
  ACME_STATE_DIR: /var/lib/acme
  ACME_HOOKS_DIR: /etc/acme/hooks
  Default directory URL: https://acme-staging.api.letsencrypt.org/directory
  Preferred key type: ecdsa-nistp384
  Additional webroots:
    /var/run/acme/acme-challenge
Available accounts:
  Account(acme-staging.api.letsencrypt.org%2fdirectory/grqffavzgeh477zs76k3a4n2ehiqjtxpt4dzmmo5b6ewjni4tz2a)
    thumbprint: dW-sxyRozKl7YiKlN7O5mTkGZEyqwF4eYephyLdFACw
Target(www.theinterwebz.de;https://acme-staging.api.letsencrypt.org/directory;0)
  best: Certificate(Wz8stnwW8kWSYhZR5BDAYZKENzYDtPnbDb1WYOPwimNF2F0LG8LRm)Code-Sprache: PHP (php)
MariaDB konfigurieren
Den MariaDB/MySQL Server lasse ich weitgehend auf Standard-Debian Konfiguration. Vor allem soll er überhaupt nicht von extern erreichbar sein, was durch bind-address = 127.0.0.1 sichergestellt bleibt. Derart eingeschränkt bedarf es auch keiner SSL-Konfiguration, da alles auf der Maschine lokal verbleibt. Auf meinem Webserver befinden sich schon eine gewisse Anzahl an Webseiten, da musste ich der Datenbank etwas mehr Ressourcen geben. Für den Anfang ist dies aber noch nicht notwendig.
Administraton via mysql command line client
Die Administation des MariaDB Servers mit dem Tool mysql funktioniert out-of-the-box. Hier sind keine Mehrarbeiten notwendig. Sinnvoll ist es natürlich den oder die Admin-User mit einem hinreichend sicheren Passwort zu versehen.
Administration via phpMyAdmin
Alternativ kann man auch analog zur Apache2 VHost Konfiguration einen weiteren VirtualHost für den phpMyAdmin anlegen. Z. B. auf den Hostnamen ’server.theinterwebz.de‘. Auch dieser sollte dann einen eigenen PHP-Pool bekommen.
ProFTPd konfigurieren
Für den ProFTPd habe ich mir etwas recht pfiffiges ausgedacht. Und zwar forciere ich die Verschlüsselung der FTP Verbindung. Dabei wollte ich allerdings zusätzlich noch in der Lage sein, anonym und unverschlüsselt Daten via FTP zu verteilen. Sogar anonymer Upload in ein designiertes Verzeichnis lässt sich so realisieren.
Allerdings wird dieser gesamte Block und auch der Service selbst nur dann benötigt, wenn Dritte Zugriff auf ihren Webroot erhalten sollen – ohne direkt Shellzugang zu bekommen. Gibt es nur einen Administrator für alle gehosteten Webseiten, kann dieser Schritt ausgelassen werden.
Wird auf unverschlüsselter Verbindung ein Benutzername außer ‚anonymous‘ angegeben, wird die Verbindung sofort getrennt. Dies passiert direkt nach Senden des Benutzernamens. Somit sollte sichergestellt sein, dass der Client das Passwort nicht mehr im Klartext hinterher schicken kann. Ganz ähnlich schützt auch mein Mailserver seine User.
Der user anonymous / ftp hat sein Verzeichnis in /srv/ftp und ist dort eingesperrt. Existierende Benutzer werden in ihrem Homeverzeichnis eingesperrt. Das setzt natürlich voraus, dass der User ein Passwort hat. Weiter oben habe ich ‚web1‘ mit –system angelegt – also ohne Passwort!
/etc/proftpd/proftpd.conf
#
# /etc/proftpd/proftpd.conf -- This is a basic ProFTPD configuration file.
# To really apply changes, reload proftpd after modifications, if
# it runs in daemon mode. It is not required in inetd/xinetd mode.
#
# Includes DSO modules
Include /etc/proftpd/modules.conf
# Set off to disable IPv6 support which is annoying on IPv4 only boxes.
UseIPv6				on
# If set on you can experience a longer connection delay in many cases.
IdentLookups			off
ServerName			"Debian"
ServerType			standalone
DeferWelcome			off
MultilineRFC2228		on
DefaultServer			on
ShowSymlinks			on
TimeoutNoTransfer		600
TimeoutStalled		600
TimeoutIdle			1200
DisplayLogin                welcome.msg
DisplayChdir               	.message true
ListOptions                	"-l"
DenyFilter			\*.*/
# Use this to jail all users in their homes
DefaultRoot			~
# Users require a valid shell listed in /etc/shells to login.
# Use this directive to release that constrain.
RequireValidShell		off
# Port 21 is the standard FTP port.
Port				21
# In some cases you have to specify passive ports range to by-pass
# firewall limitations. Ephemeral ports can be used for that, but
# feel free to use a more narrow range.
# PassivePorts                  49152 65534
# If your host was NATted, this option is useful in order to
# allow passive tranfers to work. You have to use your public
# address and opening the passive ports used on your firewall as well.
# MasqueradeAddress		1.2.3.4
# This is useful for masquerading address with dynamic IPs:
# refresh any configured MasqueradeAddress directives every 8 hours
<IfModule mod_dynmasq.c>
# DynMasqRefresh 28800
</IfModule>
# To prevent DoS attacks, set the maximum number of child processes
# to 30.  If you need to allow more than 30 concurrent connections
# at once, simply increase this value.  Note that this ONLY works
# in standalone mode, in inetd mode you should use an inetd server
# that allows you to limit maximum number of processes per service
# (such as xinetd)
MaxInstances			30
# Set the user and group that the server normally runs at.
User				proftpd
Group				nogroup
# Umask 022 is a good standard umask to prevent new files and dirs
# (second parm) from being group and world writable.
Umask				022  022
# Normally, we want files to be overwriteable.
AllowOverwrite		    on
AllowRetrieveRestart            on
AllowStoreRestart               on
# Uncomment this if you are using NIS or LDAP via NSS to retrieve passwords:
# PersistentPasswd		off
# This is required to use both PAM-based authentication and local passwords
# AuthOrder			mod_auth_pam.c* mod_auth_unix.c
# Be warned: use of this directive impacts CPU average load!
# Uncomment this if you like to see progress and transfer rate with ftpwho
# in downloads. That is not needed for uploads rates.
#
UseSendFile			on
TransferLog /var/log/proftpd/xferlog
SystemLog   /var/log/proftpd/proftpd.log
# In order to keep log file dates consistent after chroot, use timezone info
# from /etc/localtime.  If this is not set, and proftpd is configured to
# chroot (e.g. DefaultRoot or <Anonymous>), it will use the non-daylight
# savings timezone regardless of whether DST is in effect.
SetEnv TZ :/etc/localtime
<IfModule mod_quotatab.c>
QuotaEngine off
</IfModule>
<IfModule mod_ratio.c>
Ratios off
</IfModule>
# Delay engine reduces impact of the so-called Timing Attack described in
# http://www.securityfocus.com/bid/11430/discuss
# It is on by default.
<IfModule mod_delay.c>
DelayEngine on
</IfModule>
<IfModule mod_ctrls.c>
ControlsEngine        off
ControlsMaxClients    2
ControlsLog           /var/log/proftpd/controls.log
ControlsInterval      5
ControlsSocket        /var/run/proftpd/proftpd.sock
</IfModule>
<IfModule mod_ctrls_admin.c>
AdminControlsEngine off
</IfModule>
#
# This is used for FTPS connections
#
Include /etc/proftpd/tls.conf
# Include other custom configuration files
Include /etc/proftpd/conf.d/Code-Sprache: PHP (php)
/etc/proftpd/tls.conf
#
# Proftpd sample configuration for FTPS connections.
#
# Note that FTPS impose some limitations in NAT traversing.
# See http://www.castaglia.org/proftpd/doc/contrib/ProFTPD-mini-HOWTO-TLS.html
# for more information.
#
<IfModule mod_tls.c>
TLSEngine                               on
TLSLog                                  /var/log/proftpd/tls.log
TLSProtocol                             TLSv1.3 TLSv1.2
TLSCipherSuite				AES256+EECDH:AES256+EDH

TLSRSACertificateFile       /var/lib/acme/live/debian.theinterwebz.de/cert
TLSRSACertificateKeyFile    /var/lib/acme/live/debian.theinterwebz.de/privkey
#
# CA the server trusts...
TLSCACertificateFile 	/var/lib/acme/live/debian.theinterwebz.de/chain
# Per default drop connection if client tries to start a renegotiate
# This is a fix for CVE-2009-3555 but could break some clients.
#
TLSOptions			AllowClientRenegotiations NoSessionReuseRequired AllowPerUser
# Are clients required to use FTP over TLS when talking to this server?
#
TLSRequired                             on
#
# Allow SSL/TLS renegotiations when the client requests them, but
# do not force the renegotations.  Some clients do not support
# SSL/TLS renegotiations; when mod_tls forces a renegotiation, these
# clients will close the data connection, or there will be a timeout
# on an idle data connection.
#
TLSRenegotiate                          required off
# Anonymous config must be set from within the TLS module config block
# Include /etc/proftpd/anonymous.conf
</IfModule>Code-Sprache: PHP (php)
Die Zeile Include /etc/proftpd/anonymous.conf aktiviert den (unverschlüsselten) anonymen Zugang zu Dateien in /srv/ftp. Diese müsste dazu auskommentiert werden. Dabei wird die nachfolgende Konfigurationsdatei eingebunden, in der man sogar den Upload nach /srv/ftp/upload aktivieren könnte.
/etc/proftpd/anonymous.conf
<Anonymous ~ftp>
	User ftp
	Group ftp
	UserAlias anonymous ftp
	RequireValidShell off
	# Note how TLSRequired is set to off here in the <Anonymous> context
	TLSRequired off
	# We want 'welcome.msg' displayed at login, and '.message' displayed
	# in each newly chdired directory.
	# DisplayLogin			welcome.msg
	# DisplayChdir			.message
	# Limit WRITE everywhere in the anonymous chroot
	<Directory *>
		<Limit WRITE>
			DenyAll
		</Limit>
	</Directory>

	# Uncomment this if you're brave.
	# <Directory upload>
	# Umask 022 is a good standard umask to prevent new files and dirs
	# (second parm) from being group and world writable.
	# Umask	022	022
	# 	<Limit READ WRITE>
	# 		DenyAll
	# 	</Limit>
	# 	<Limit STOR>
	# 		AllowAll
	# 	</Limit>
	# </Directory>
</Anonymous>Code-Sprache: PHP (php)
Man merkt schon am Kommentar („Uncomment this if you’re brave.“) zum ‚upload‘-Pfad, dass hier ein Verzeichnis für die gesamte Welt via FTP beschreibbar gemacht wird. Hier kann jedermann alles Mögliche – auch Viren oder Schadsoftware – hochladen. Darum habe ich auch das Herunterladen von Dateien aus dem ‚upload‘-Verzeichnis eingeschränkt. Eigentlich dient dieser Pfad gar keinem besonderen Zweck, ich nutze ihn nur gelegentlich als „Dropbox“ für Bekannte. Lasst es also im Zweifel aus!
Dennoch würde ich in jedem Fall empfehlen, die Datei- und Verzeichnisberechtigungen von /srv/ftp einzuschränken:
root@debian:/srv/ftp# mkdir upload
root@debian:/srv/ftp# mkdir download
root@debian:/srv/ftp# chown -R ftp:nogroup ./*
root@debian:/srv/ftp# chmod -R 555 download
root@debian:/srv/ftp# chmod -R 755 uploadCode-Sprache: PHP (php)
TLS VHost aktivieren
Jetzt, da alle Komponenten für das Webhosting bereit sind, kann man den SSL-VHost aktivieren und den Apache2 durchstarten. Um die Ausführung von PHP-Skripten zu testen erstellen wir uns eine /var/www/www.theinterwebz.de/docs/index.php, welche wir durch Aufruf von https://www.theinterwebz.de testen können.
<?php
phpinfo();Code-Sprache: PHP (php)root@debian:/var/www/www.theinterwebz.de/docs# a2ensite www.theinterwebz.de-ssl.conf
root@debian:/var/www/www.theinterwebz.de/docs# systemctl restart apache2Code-Sprache: PHP (php)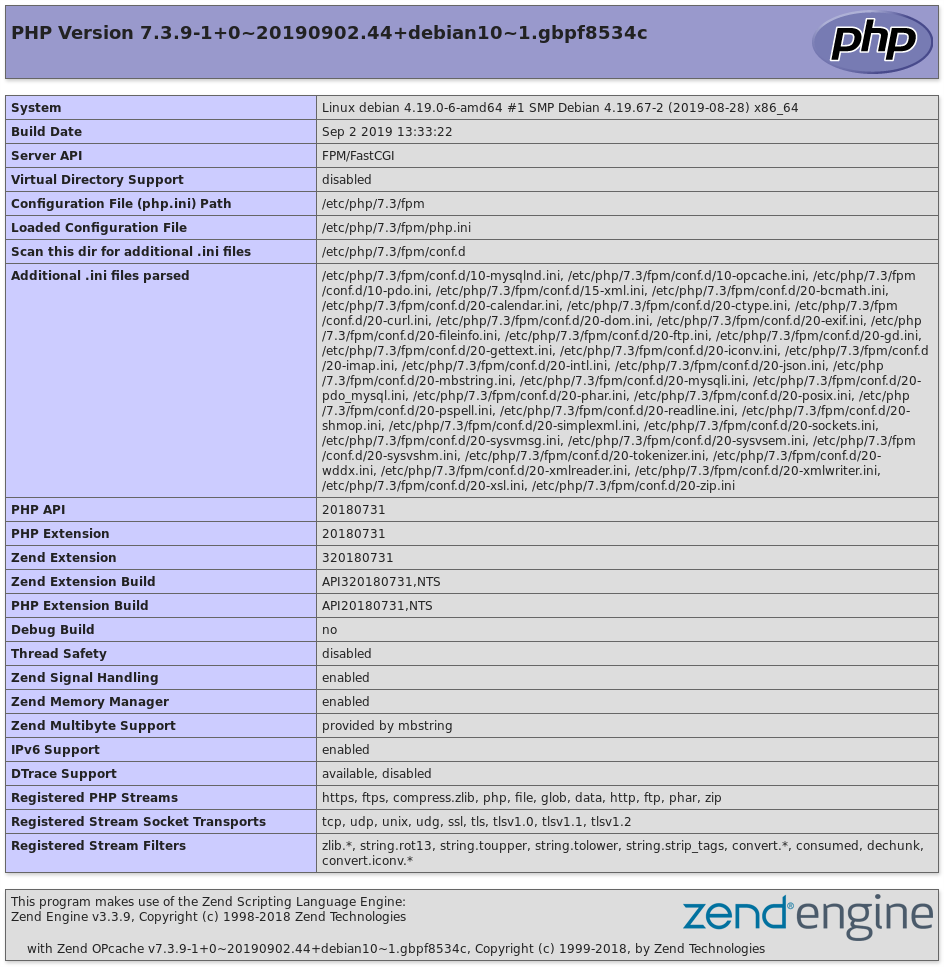
Testen der Einstellungen
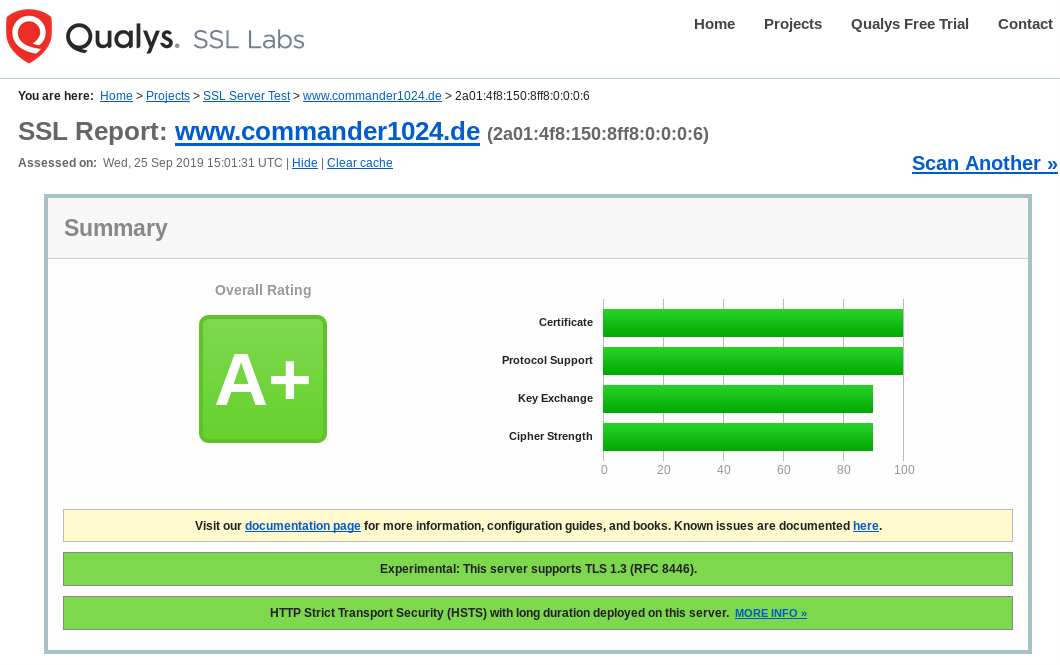
Jetzt kann das Setup mit Diensten wie dem Qualys SSL-Test getestet werden. Das Ergebnis sollte ähnlich dem folgenden Screenshot aussehen.
TLS bei anderer Software härten
An dieser Stelle möchte ich noch auf https://cipherli.st/ hinweisen. Hier finden sich regelmäßig aktualisierte Snippets für vernünftige TLS/SSL-Einstellungen diverser Softwareprodukte, auch über das reine Webhosting hinaus. Auch ich habe mich für den Apache2 und den ProFTPd dort bedient. Ebenso wie bei den für meinen Mailserver relevanten Diensten.


[…] über die seit einiger Zeit verfügbare v02-API validieren. Ich verwende, wie im Artikel (Secure) Webhosting 1×1 beschrieben das Werkzeug ‘acmetool’ zum automatisch Ausstellen und Verlängern von […]
Hi Commander,
cooles HowTo, danke dafür! Endlich mal ein aktuelles und sicheres
ich hätte 2 Anmerkungen:
1) ich würde die Parameter nicht von HTTP zu HTTPS weiterleiten da diese unverschlüsselt den Server erreicht haben und damit eigentlich nicht sicher sind. So kann man Usern das nutzen dieser Funktion direkt abgewöhnen.
2) ich habe bei den SSL Ciphern folgendes gemacht:
– OpenSSL alle Ciphers ausgeben lassen, sortiert nach Sicherheit
– Die Schreibweise in die für den Apache übersetzt
– geschaut welche davon bei Qualys als sicher gelten
dabei ist folgende Liste herausgekommen:
TLS_AES_256_GCM_SHA384:TLS_CHACHA20_POLY1305_SHA256:TLS_AES_128_GCM_SHA256:ECDHE-RSA-AES256-GCM-SHA384:DHE-RSA-AES256-GCM-SHA384:ECDHE-RSA-CHACHA20-POLY1305-OLD:DHE-RSA-CHACHA20-POLY1305-OLD:DHE-RSA-AES256-CCM8:DHE-RSA-AES256-CCM:ECDHE-ARIA256-GCM-SHA384:DHE-RSA-ARIA256-GCM-SHA384:ECDHE-RSA-AES128-GCM-SHA256:DHE-RSA-AES128-GCM-SHA256:DHE-RSA-AES128-CCM8:DHE-RSA-AES128-CCM:ECDHE-ARIA128-GCM-SHA256:DHE-RSA-ARIA128-GCM-SHA256
Wenn große Kompatibilität gefordert ist, kann man noch diese beiden (unsicheren) ergänzen:
ECDHE-RSA-AES256-SHA384:ECDHE-RSA-AES256-SHA
Deine Meinung dazu würde mich interessieren
Beste Grüße
Sebo
Hi Sebo,
Zu 1) Da hast Du Recht, dass das eigentlich nicht nötig ist. Aber andererseits, Du sagst es ja selbst, die Parameter wurden dann ja in jedem Fall schon unverschlüsselt via http gesendet, ob sie nun mit übernommen werden oder nicht, das angesteuerte Ziel ist damit in jedem Fall bereits geleaked. Tatsächlich hatte ich jahrelang einen redirect ohne Parameter in Benutzung auf meinem Server. Ich wollte aber eine copy&paste kompatible Lösung, über die man sich keine Gedanken machen muss in den Artikel einbetten.
Zu 2) Die Sortierung der Cipher wird von einigen Clients (gerade mobilen) gerne mal irgnoriert. Sicherlich gibt es mehr vertretbare Cipher, als die im Artikel angegebenen. Hier bin ich tatsächlich einfach der cipherli.st Empfehlung gefolgt. Zumindest ist mir noch kein halbwegs moderner Client untergekommen, der diese nicht verstanden hätte. Aber je länger die Liste, umso mehr muss man auf deren Sicherheit achten und im Zweifel nacharbeiten. Daher hatte ich sie bewusst kurz gelassen. Aber schön, hier noch eine kompatiblere, breiter gefächerte Auswahl zusätzlich stehen zu haben. Danke